If you want to master the art of making delicious rice balls at home, you're in the right place. The secret to creating these flavorful bites lies in a few key steps.
Start by preparing warm, sticky rice and shaping it into balls. Then, add a surprise filling like savory meat or gooey cheese to take your rice balls to the next level.
Finally, coat them in a crispy outer layer before frying or baking to perfection. Follow these steps, and you'll be savoring your homemade rice balls in no time. Enjoy the culinary journey!
Key Takeaways
To make delicious rice balls at home, start by using Japanese short-grain sushi rice for its sticky texture. Next, mix the warm rice with flavorful fillings like furikake for added taste. Shape the rice balls with hands moistened with saltwater to enhance seasoning. Then, coat the rice balls in flour, eggs, and breadcrumbs to achieve a crispy outer layer. Finally, fry the coated rice balls in hot oil until they turn a beautiful golden brown color.
Rice Ball Ingredients
Creating the perfect rice ball involves a combination of key ingredients and techniques. The choice of rice is crucial, with Japanese short-grain sushi rice or Koshihikari rice being the preferred options for their sticky texture. Achieving the right rice-water ratio is essential to ensure the rice holds together without being too mushy or dry.
When it comes to fillings, the possibilities are endless. From savory salted plum to flavorful seasoned seaweed, each filling adds a burst of taste to every bite. To prevent sticking when shaping the rice balls, wet your hands with a mixture of water and salt. Get creative with shapes like triangles or balls to make your rice balls visually appealing.
To take your rice balls to the next level, consider adding toppings like furikake, sesame seeds, or a drizzle of soy sauce for an extra flavor boost. These seasonings can transform your snack from good to gourmet with minimal effort.
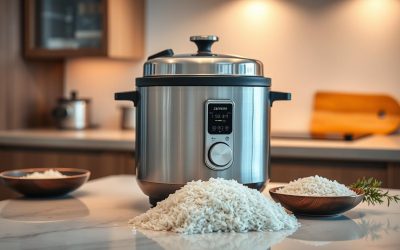
Cooking Arborio Rice
In the realm of culinary grains, Arborio rice shines like a virtuoso, conducting the symphony of creamy risotto dishes. Mastering the art of cooking Arborio rice is paramount in creating the luscious texture that defines this Italian staple.
With its high starch content, Arborio rice becomes the perfect canvas for a velvety risotto. To prepare Arborio rice flawlessly, commence by sautéing it in butter or oil until it turns translucent. Then, in a gradual dance, introduce warm broth, stirring tirelessly until each ladleful is absorbed before introducing the next.
The enchantment unfolds through the constant stirring, coaxing out the rice's starches that bestow upon your risotto that coveted creamy consistency. The ultimate aim is to achieve a dish that's al dente, where the rice is both creamy and delicately firm to the tooth. Thus, persist in the stirring until you achieve that ideal balance.
Each swirl with Arborio rice brings you closer to a bowl of risotto nirvana.
Mixing and Shaping
Now that you've mastered the art of cooking Arborio rice to creamy perfection, it's time to embrace the sticky nature of rice and shape these delectable rice balls into works of art. Begin by mixing warm cooked rice with flavorful seasonings like furikake to enhance their taste.
To prevent the rice from sticking to your hands, moisten them with salt water before you start shaping. Whether you opt for traditional triangles or playful balls, you can use a mold or shape them by hand.
As you shape the rice balls, remember to apply gentle pressure to ensure they maintain their form. The ideal texture should be just right – not too loose, not too firm. Get creative as you mold each piece with care.
For a final touch, wrap your creations in nori seaweed to add that classic Japanese flair. So, roll up your sleeves, grab that rice, and let the shaping process begin!
Coating and Frying
To elevate the crunch and flavor of your rice balls, consider coating and frying them until they reach a delightful crispiness in hot oil. Transforming your freshly molded rice into enticing balls is just the beginning. The next step involves creating a golden brown outer layer that's both irresistible and flavorful.
Begin by coating each rice ball in flour, dipping it in beaten eggs, and generously covering it with breadcrumbs. This three-layer coating technique is the key to achieving a crispy texture that locks in the rice's moisture, resulting in a delectable crust that will keep you coming back for more.
When it's time to fry your coated rice balls, ensure that your deep-fryer or deep pan is heated with oil to the perfect frying temperature. Gently place the rice balls in the hot oil and allow them to sizzle until they achieve a beautiful golden brown color on all sides. The frying process not only enhances the texture but also imparts a mouthwatering aroma to the rice balls, making them a perfect appetizer.
Once they're perfectly fried, indulge in these flavorful treats that will surely leave you wanting more!
Serving and Enjoying
Elevate your onigiri experience to a whole new level by mastering the art of serving and enjoying these Japanese delights. For the ultimate flavor explosion, savor your rice balls while they're still warm. Traditional fillings like pickled plum, salted salmon, or bonito flakes will awaken your taste buds with their authentic taste. Keep the nori seaweed wrapper on to preserve the original flavors of the onigiri.
Experiment with shaping your rice balls into triangles, balls, or cylinders to add visual appeal to your meal. Whether you're in need of a quick snack or a convenient on-the-go meal, onigiri is the perfect choice. Make sure to season your rice well before molding it into these delightful treats. Store your onigiri in plastic wrap or an airtight container to keep them fresh until you're ready to indulge.
Prepare to relish every mouthful of these delightful Japanese snacks and let their flavors transport you to a world of culinary delight!
Frequently Asked Questions
How to Get Rice Balls to Stick Together?
To ensure your rice balls stick together harmoniously, moisten your hands with a touch of briny flavor, opt for Japanese short-grain rice known for its sticky texture, and gently exert pressure while shaping them. Allow the rice balls to cool slightly, and for an added bond, consider incorporating a hint of cooked rice vinegar. This will enhance their cohesiveness and ensure a delightful eating experience.
What Is a Rice Ball Made Of?
Crafted from Japanese short-grain rice, a rice ball is a delightful creation shaped into triangles, balls, or cylinders. These treats, known as onigiri, are often wrapped in nori seaweed and can be filled with a variety of ingredients such as salted salmon, pickled plum, tuna, or even spicy cod roe. The combination of the sticky rice and flavorful fillings creates a satisfying and portable snack or meal option.
How to Make Rice Balls Without a Rice Ball Maker?
Shape warm, cooked rice with wet hands to make rice balls without a rice ball maker. Press firmly to ensure stability. Experiment with various fillings such as pickled plums to add a burst of flavor. Enhance the taste by wrapping the rice balls with nori seaweed. Embrace your creativity and enjoy making these delicious treats without the need for any fancy tools. Remember, the key is to have fun and customize your rice balls to suit your taste preferences.
How Do You Make Rice Balls That Don't Fall Apart?
To create rice balls that stay intact, firmly shape them and moisten your hands with salt water for both flavor and stickiness. You may opt for a rice ball mold to ensure consistent shapes. Enhance the structure by wrapping the rice balls with nori. This method not only adds flavor but also helps hold the rice balls together.
Conclusion
Now that you've become a pro at crafting rice balls in your kitchen, get ready to amaze your friends and family with your newfound culinary expertise! Whether you opt for traditional Japanese flavors or experiment with innovative fillings and coatings, the culinary world is your oyster.
Gather your ingredients, roll up your sleeves, and prepare to indulge in the delightful crispy exterior and melt-in-your-mouth center of your homemade rice balls. Enjoy the process of creating these savory treats!
For an advanced twist, consider infusing your rice balls with ingredients like spicy tuna, kimchi, or even a fusion of Mediterranean flavors. The possibilities are endless, so let your creativity run wild in the kitchen. If you're feeling adventurous, try incorporating unique textures like crispy tempura or crunchy sesame seeds for an extra layer of taste.
Remember, the key to perfect rice balls lies in the balance of flavors, textures, and presentation. So, experiment with different shapes and sizes to add visual appeal to your creations. And don't forget to share your culinary masterpieces on social media to inspire others to embark on their own rice ball-making journey.
Take your rice ball game to the next level by exploring various dipping sauces, such as soy sauce with wasabi or a tangy ponzu dressing. These condiments can elevate the flavors of your rice balls and provide an extra burst of taste with each bite.
Now that you've honed your skills in making rice balls, why not delve deeper into the world of Japanese cuisine? Explore traditional recipes, learn about the cultural significance of different ingredients, and expand your culinary horizons. Keep exploring, keep experimenting, and keep delighting your taste buds with homemade delicacies. Happy cooking!